
-
-
You need to attach the discharge plate (531-10080) in the correct orientation for your case former’s confguration: LEFT-HAND or RIGHT-HAND.
-
-
-
Disconnect the cylinder’s pneumatic tubing from the valve.
-
-
-
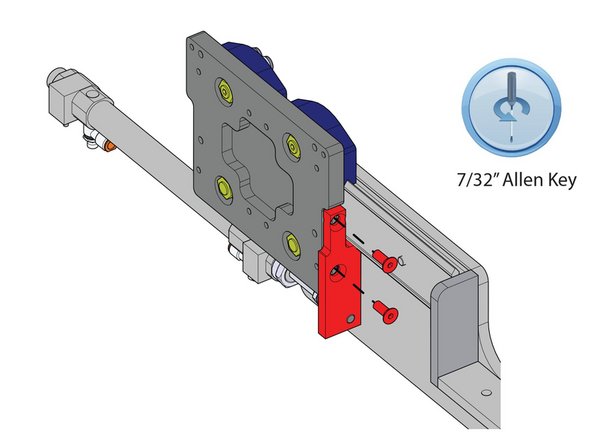
Unscrew the discharge pusher plate.
-
-
-
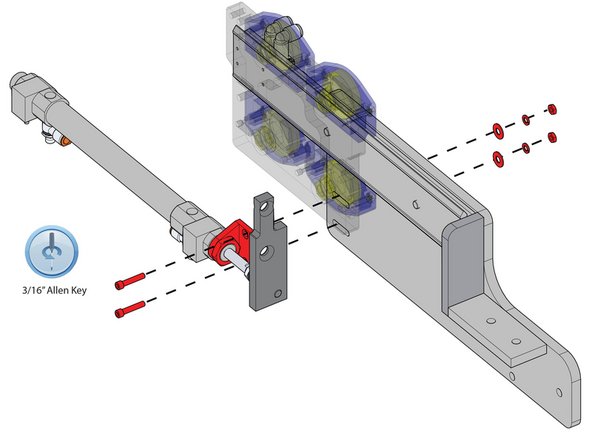
Unscrew the foot mounting and remove the cylinder.
-
-
-
Attach the foot mounting to the discharge pusher track with the supplied fasteners (see parts list) and tighten to 13.8 lb-ft.
-
-
-
Attach the discharge pusher plate to the carriage and tighten to 20 lb-ft.
-
-
-
Insert 1/4” tube adapters into the valve.
-
-
-
Connect the cylinder to the pneumatic valve using 1/4” pneumatic tubing.
-
-
-
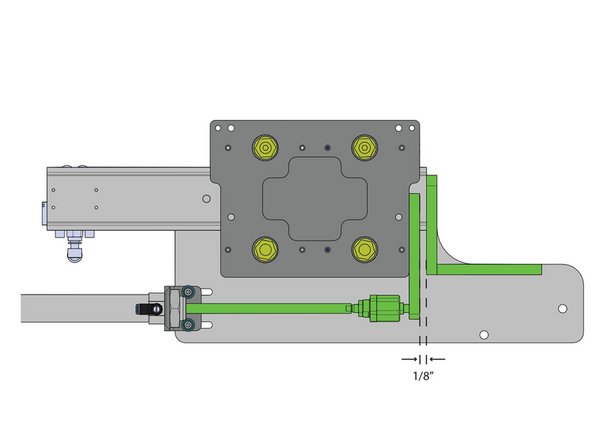
Set the maximum stroke of the cylinder so it leaves a minimum 1/8" gap between the carriage and the weldment.
-
-
-
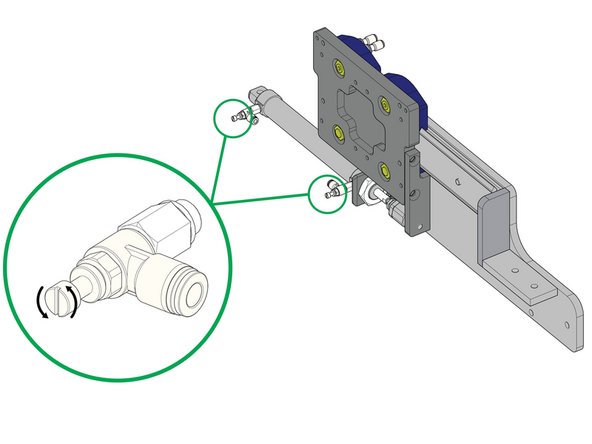
Adjust the speed of the cylinder using the valve flow controls:
-
To increase speed, turn the adjustment screw counterclockwise.
-
To decrease speed, turn the adjustment screw clockwise.
-
Check the cylinder speed with each adjustment until the rate is satisfactory.
-
Lock the flow control knobs by tightening the locking nut on each of them.
-


Thank you for contacting us. For us to better assist you, please reach out to our technical support by phone at 1.888.565.3219 or 604.930.9300 or by email at Wexxar.Service@promachbuilt.com or Wexxar.Parts@promachbuilt.com along with your machine model and serial number. One of our tech support reps will be glad to answer any questions you may have.
Thank you for contacting us. For us to better assist you, please reach out to our technical support by phone at 1.888.565.3219 or 604.930.9300 or by email at Wexxar.Service@promachbuilt.com or Wexxar.Parts@promachbuilt.com along with your machine model and serial number. One of our tech support reps will be glad to answer any questions you may have.