
Introduction
Conveyor belts on the WF20 and WF30 should be replaced every nine months or when the surface becomes smooth.
-
-
Remove any sensors from the conveyor belt assembly.
-
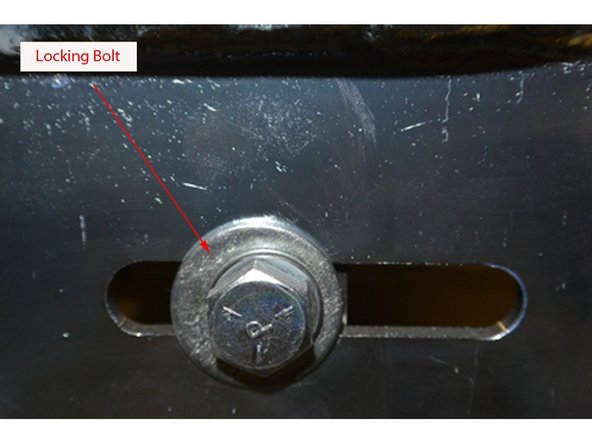
On the back of the idle pulley shaft, loosen the locking bolt.
-
On the idle pulley shaft, on the adjusting screws, loosen the 4 nuts.
-
Unbolt and remove the cover plate.
-
Slide the idle pulley square shaft to relieve the belt tension.
-
Remove the belt.
-
-
-
Place a new belt on the pulley.
-
On the idle pulley shaft, hand tighten the top and bottom inner nuts so that the belt is in a no-load condition.
-
Place two marks on the belt 25” apart.
-
In tandem, on the adjusting screws, tighten the inner upper and lower nuts until the distance between the markers is 25 ¼”. The upper nut controls the tension and the lower nut controls the angle of the shaft.
-
When the belt is correctly tensioned the pulley will be centered on the belt and will not ride up or down when running.
-
-
-
On the adjusting screws, re-tighten the outer nuts.
-
Attach and bolt the cover plate.
-
On the back of the idle pulley shaft, tighten the locking bolt.
-
Reattach any sensors.
-


Thank you for contacting us. For us to better assist you, please reach out to our technical support by phone at 1.888.565.3219 or 604.930.9300 or by email at Wexxar.Service@promachbuilt.com or Wexxar.Parts@promachbuilt.com along with your machine model and serial number. One of our tech support reps will be glad to answer any questions you may have.
Thank you for contacting us. For us to better assist you, please reach out to our technical support by phone at 1.888.565.3219 or 604.930.9300 or by email at Wexxar.Service@promachbuilt.com or Wexxar.Parts@promachbuilt.com along with your machine model and serial number. One of our tech support reps will be glad to answer any questions you may have.
Cancel: I did not complete this guide.
2 other people completed this guide.