-
-
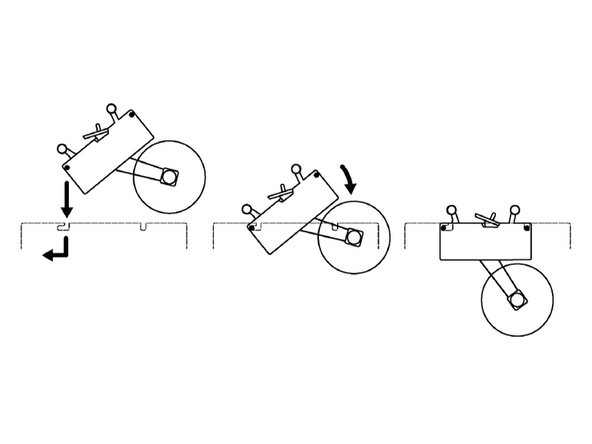
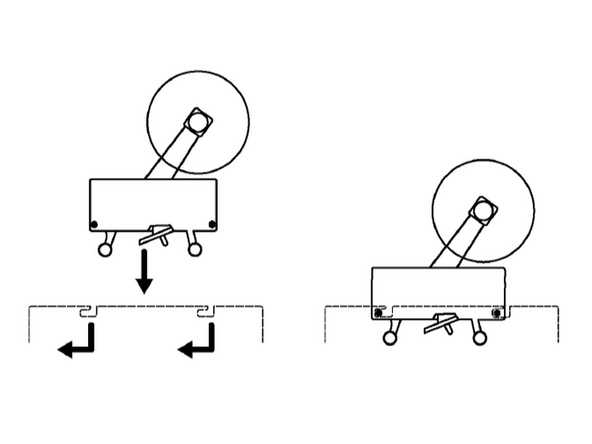
1 Remove the bolts that secure the BEL 290 to the shipping base.
-
2 Use a forklift to move the machine off its base, with wooden blocks between the forks and the frame.
-
3 While the machine is elevated, install the footpad extensions or castor extensions to the bottom of each leg and adjust them for the desired operating height.
-
4 Position the BEL 290 where it is to be used.
-
-
-
When selecting the machine location, carefully consider the following points:
-
Adequate access around the machine for correct operation and service.
-
Sufficient room to open the access doors (including control enclosure).
-
A minimum 3-foot clearance in front of the main electrical enclosure.
-
Sufficient clearance for magazine width increases that occur when the machine is set up for large cases.
-
Easy lift-truck access.
-
Good access for magazine loading and nearby space for pallet loads of flat cases
-
Note that the bi-fold doors jut out further when the ‘C’ adjustment is shortened for shorter cases. This increase in machine width should be taken into consideration while ensuring easy access for magazine loading.
-
-
-
1 Set the BEL 290 for maximum Dimension ‘C’ (with the magazine in the maximum rearward position).
-
2 Use at least a two-foot carpenter level, marked on one end so that you always work to the same bubble line and with the concave side down (if there is one).
-
3 Open the bi-fold door, and position the spirit level along the length of the main frame to level one side of the BEL 290.
-
4 Adjust the machine leveling feet on this side of the machine as appropriate to centralize the bubble between the parallel lines.
-
5 Position the spirit level on the main frame along the width of the machine at the discharge end.
-
6 Adjust the machine leveling feet under the magazine and discharge ends on the opposite side in order to centralize the bubble between the parallels. Tighten the level adjuster lock nuts.
-
7 Position the spirit level on the main frame along the width of machine at the infeed end and repeat step 6. Finally, anchor the BEL 290 to the floor.
-
If PHSR guarding is installed, the bottom of the guarding should be no more than 6 inches away from the floor.
-
-
-
Machines are shipped with the tape heads secured in their brackets. To reinstall the tape heads, lower them into the brackets to align the pins on their sides with the slots in the brackets. Follow these steps:
-
Bottom Tape Head Place the tape head’s rear pins into the slots of the bracket. Then, slide to lock. Pivot down the free end so that the pins rest in the aligned slots.
-
Top Tape Head Place all of the tape head’s four pins in the slots of the bracket. Slide to secure, then lock them in place with the thumb screws.
-
Please consult the tape head manual for instructions on the mounting of tape rolls and the proper threading of tape through the applicator head.
-