Parts
-
-
LOCK-OUT AIR AND POWER BEFORE FOLLOWING THIS PROCEDURE. FAILURE TO DO SO MAY RESULT IN SERIOUS INJURY.
-
REFER TO THE ‘SAFETY’ SECTION IN THE WEXXAR OPERATING MANUAL FOR LOCK-OUT INSTRUCTIONS AND FOLLOW YOUR LOCAL SAFETY PROCEDURES.
-
-
-
Disconnect pneumatic tubing from the cylinder and valve.
-
-
-
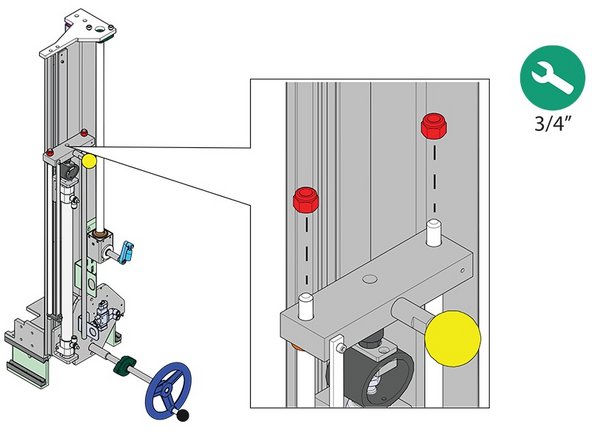
Remove the two 3/8” nyloc nuts securing the drive rods. Set the nuts aside.
-
-
-
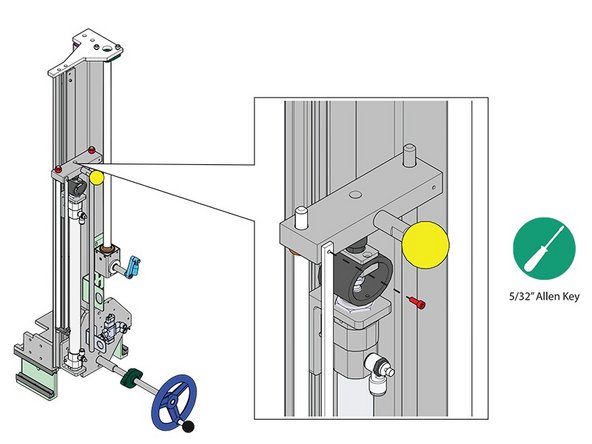
Remove the screw securing the top of the E scale.
-
You do not have to completely remove the E scale.
-
-
-
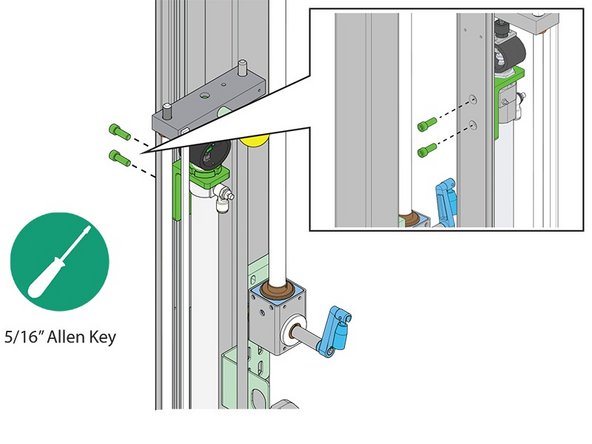
Remove the two fasteners securing the top cylinder bracket to the mast.
-
-
-
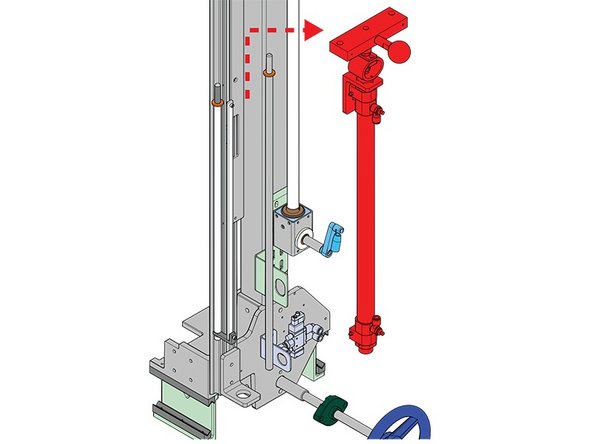
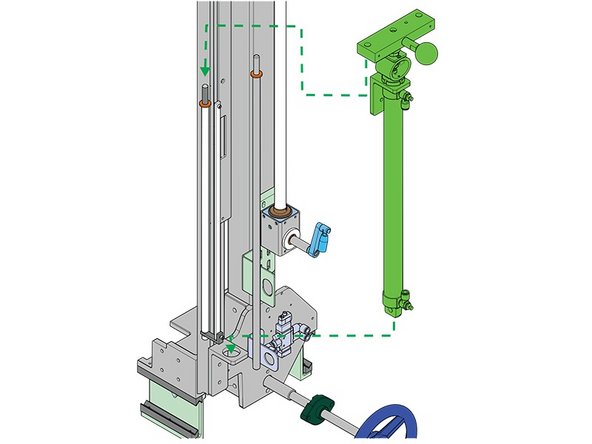
Lift the cylinder assembly off of the drive rods and remove.
-
-
-
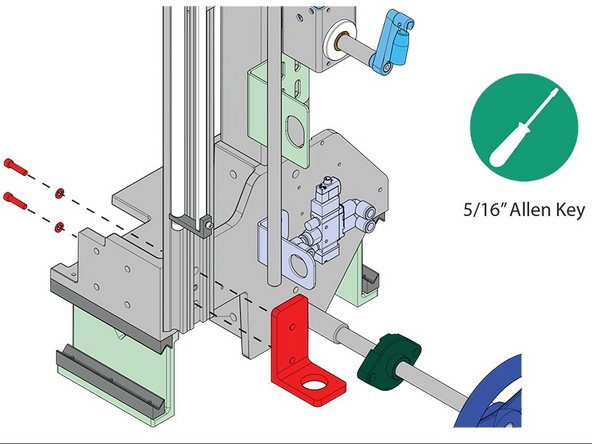
Remove the bottom cylinder bracket.
-
-
-
Attach the replacment bottom cylinder bracket (part # 531-10106) and tighten to20 lb-ft.
-
-
-
Place the cylinder assembly (part # 63-8931) on the two drive rods and in the bottom cylinder bracket.
-
-
-
Attach the top cylinder bracket to the mast and tighten to 27 lb-ft.
-
-
-
Secure the assembly to the drive rods with the two 3/8” nyloc nuts and tighten to 10 lb-ft.
-
Reattach the top of the E scale.
-
-
-
Attach the cylinder to the pneumatic valve using 3/8” pneumatic tubing.
-
Thank you for contacting us. For us to better assist you, please reach out to our technical support by phone at 1.888.565.3219 or 604.930.9300 or by email at Wexxar.Service@promachbuilt.com or Wexxar.Parts@promachbuilt.com along with your machine model and serial number. One of our tech support reps will be glad to answer any questions you may have.
Thank you for contacting us. For us to better assist you, please reach out to our technical support by phone at 1.888.565.3219 or 604.930.9300 or by email at Wexxar.Service@promachbuilt.com or Wexxar.Parts@promachbuilt.com along with your machine model and serial number. One of our tech support reps will be glad to answer any questions you may have.


